AI Room Design From a Photo: How It Works, Step by Step
An AI room designer takes one photo of your existing room and returns a photorealistic redesign in seconds, by reading the room’s structure and then repainting it in the style you choose. The technology behind it is the same class of diffusion model that powers modern image generators, fine-tuned specifically on interiors.
The render is a design idea to explore, not a construction plan, so it costs seconds and pennies instead of the weeks and thousands of dollars a full design normally takes.
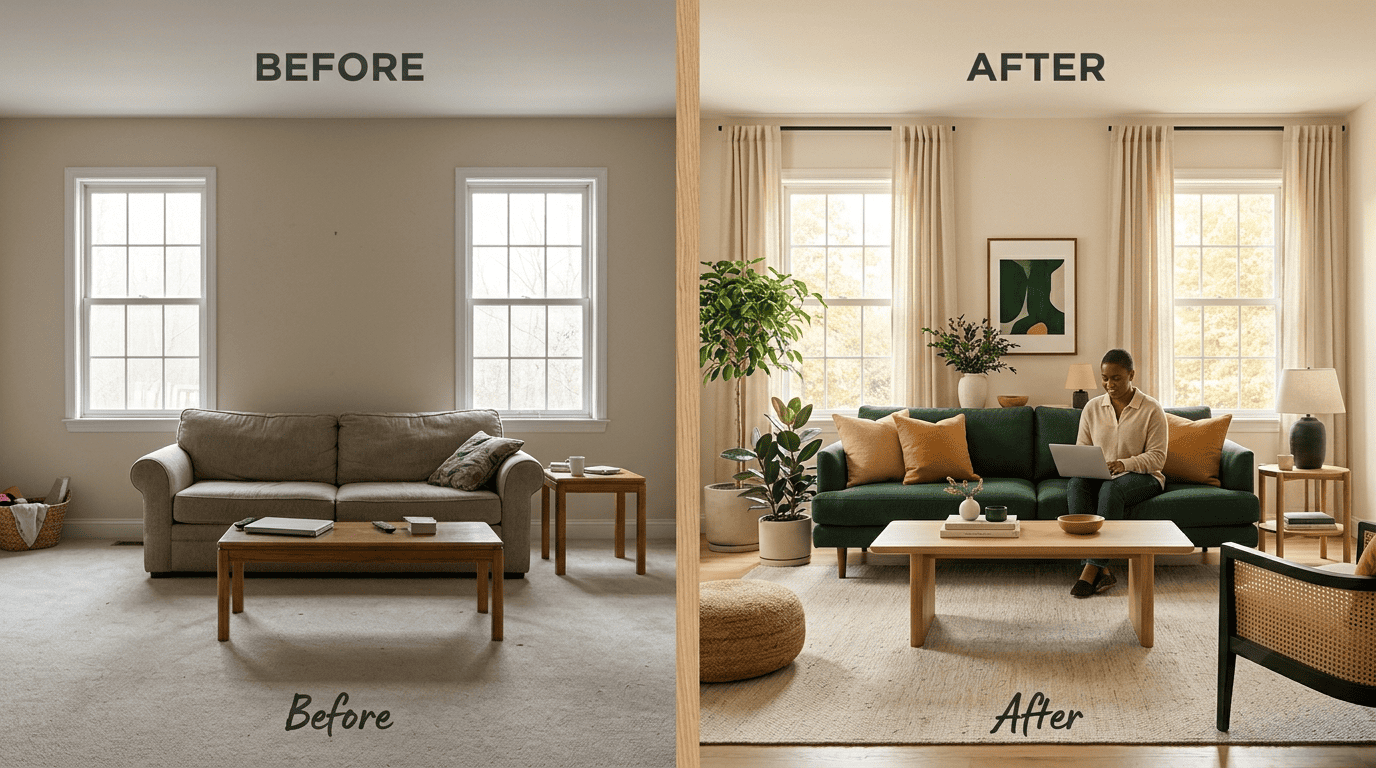
What «AI room design from a photo» actually is
There are two ways to feed an AI room design tool, and understanding the difference matters more than picking a style. One starts from your actual room; the other starts from nothing at all.
Photo-to-design vs describe-it
Image-to-design means you upload a photo of the real room, and the AI keeps its geometry while restyling everything inside it. Text-to-design means you describe an empty or imagined space in words instead, and the model invents the room from scratch. Redesigning from a photo is the more grounded path, because the AI anchors to your real walls, windows and proportions rather than inventing a room that has nothing to do with the one you actually live in. A finished render typically comes back in about 15–30 seconds.
| Image-to-design | Text-to-design | |
|---|---|---|
| Starting point | A photo of your real room | A written description |
| Keeps | Your actual walls, windows, proportions | Nothing — the room is invented |
| Best for | Redesigning a space you already have | Imagining a space that doesn’t exist yet |
| Realism | Anchored to real geometry | Depends entirely on the prompt |
Most people looking to redesign a specific room reach for image-to-design, since it does the double duty of keeping the space recognizable while still letting the style change completely. Text-to-design tends to shine for a different job — dreaming up a room that doesn’t exist yet, like a future addition or a listing photo for an empty unit.
Why people use it
Traditional interior design runs roughly $2,000–$12,000 per room and takes weeks of back-and-forth with a designer; an AI render costs a fraction of that and lands in under a minute, cutting the visualization step by an estimated 95–99%. Tools built on this model, like RoomGPT, report more than 4 million users.
Real estate agents have used a similar idea for years under the name virtual staging — digitally furnishing an empty listing photo — and an AI room designer applies the same trick to a room you already live in, not a listing you’re trying to sell. It’s a fast, cheap way to see an idea before committing a single dollar to it.
How an AI room designer redesigns your room from a photo
Under the hood, three distinct AI systems hand the job off to each other in sequence. Each one solves a narrower problem than the last, which is why the final image looks coherent instead of like a random collage.
Step 1 — It reads the room (computer vision)
Computer vision analyzes the 2D photo and rebuilds an internal understanding of the space: it finds the walls, ceiling, floor, windows, doors and existing furniture, maps the perspective lines and estimates depth. This is why a straight, whole-room shot matters so much — the AI is essentially reverse-engineering your room’s shape from a single flat image, and a poor angle gives it less to work with.
This step happens before any restyling begins, and it’s what makes the whole process different from a generic image generator: the model has to understand your specific room before it’s allowed to touch it.
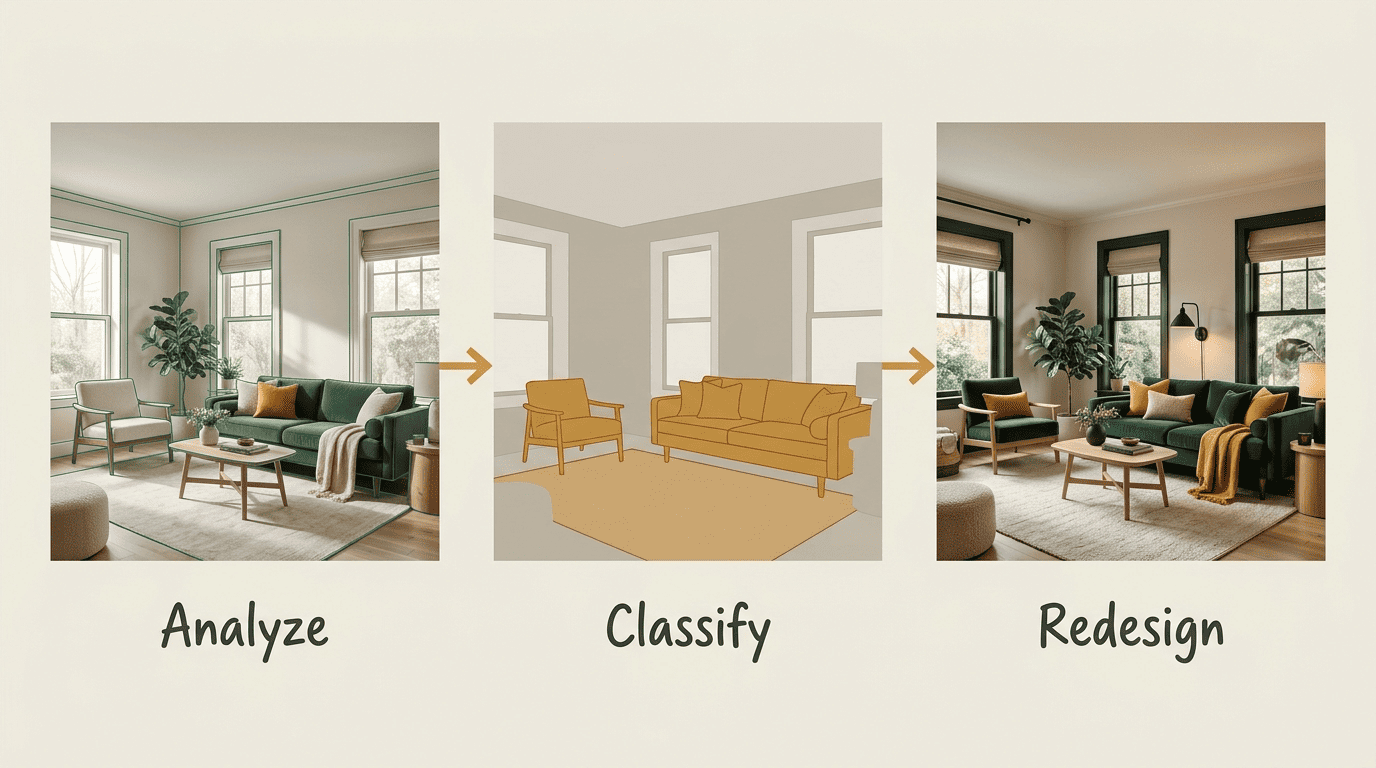
Step 2 — It labels every pixel (structural vs. removable)
Next comes semantic segmentation, where the AI classifies every pixel in the photo and sorts the room into what should stay and what can change. Structural elements — walls, window openings, the floor plane, room proportions — are preserved, so the redesign still reads as your room. Removable elements — furniture, rugs, decor, wall color — are the parts the model is free to regenerate.
This is also the step responsible for most of the «believability» in a finished render. Get the mask wrong and a window disappears or a wall shifts; get it right and the redesign looks like a photo of your actual room, just restyled.
Step 3 — It repaints the room (diffusion model)
The actual restyle is done by a diffusion model, the same family of generative AI behind tools like DALL·E and Midjourney, but fine-tuned on millions of professionally photographed interiors so it produces furniture, materials and lighting that read as a real room rather than generic AI art. Purpose-built research models such as RoomDiffusion exist specifically for the interior design industry, trained to keep a room’s fixed geometry intact while regenerating everything else. The output fuses your room’s kept structure with the style you picked into one photorealistic image.
As the researchers behind one such purpose-built model explain, general-purpose image generators aren’t a great fit for this job out of the box:
RoomDiffusion addresses specific challenges in interior design, such as lack of fashion, high furniture duplication rate, and inaccurate style.
RoomDiffusion: A Specialized Diffusion Model in the Interior Design Industry
How to take a good input photo
Garbage in, garbage out. The single biggest factor in render quality isn’t the style you pick — it’s the photo you start with. A blurry, dim or cropped shot gives the segmentation step less to work with, and the final render inherits every one of those weaknesses.
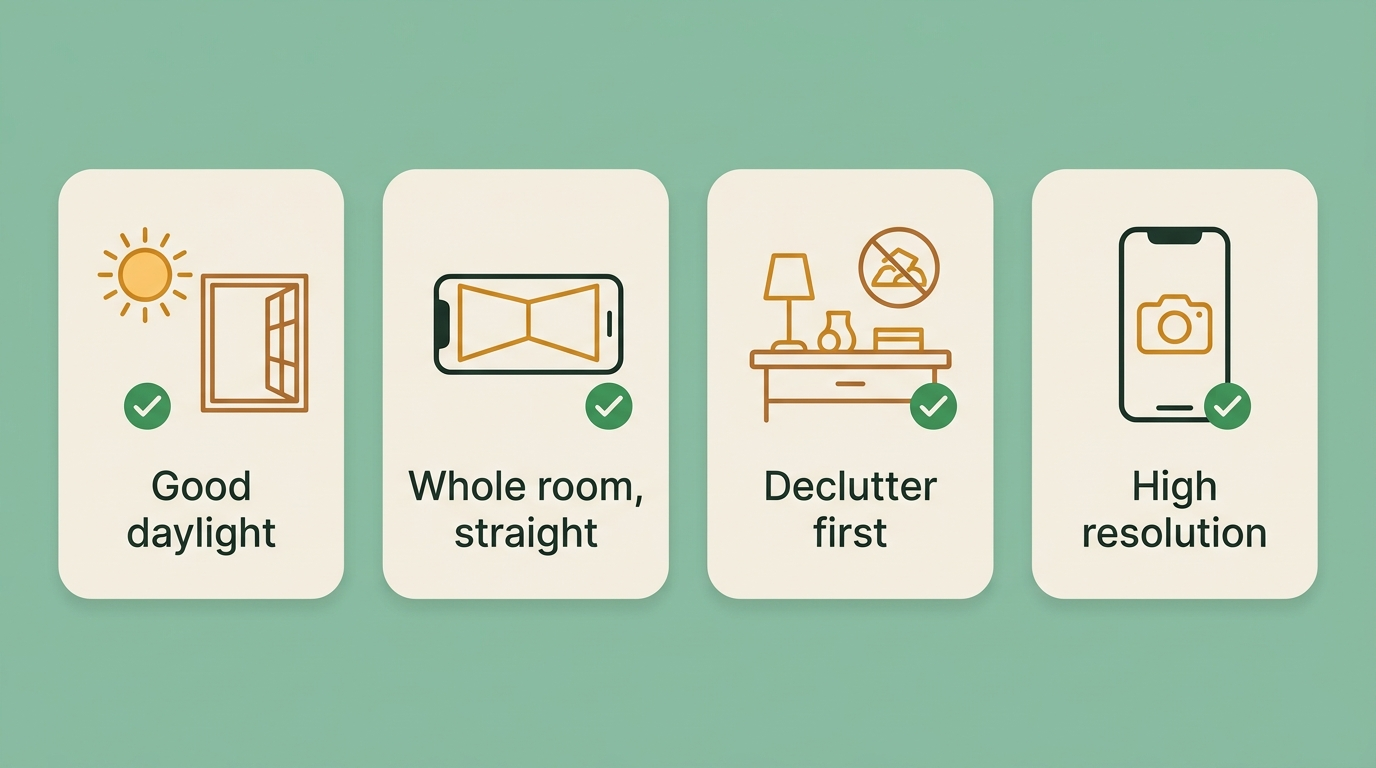
Here’s how to shoot a photo that gives the AI what it needs:
- Open every blind and turn on all the lights in the room.
- Shoot during the brightest part of the day, using natural daylight as the primary light source.
- Back into a corner or stand in a doorway instead of the center of the room.
- Frame the shot to capture two walls and the full depth of the space.
- Hold the phone level so vertical lines — door frames, windows — stay perfectly vertical.
- Clear surfaces and tidy visible clutter before you shoot.
- Use a modern smartphone or DSLR at full resolution, and avoid screenshots with grids, toolbars or watermarks.
Show the whole room, keep it straight
Don’t stand in the center of the room. Backing into a corner or shooting from a doorway captures two walls and the depth of the space at once, and holding the phone level keeps vertical lines vertical — that combination gives the AI the geometry it needs to build an accurate 3D understanding. A high-resolution shot from a modern smartphone or DSLR is plenty; screenshots with grids, toolbars or watermarks baked in can confuse the model into treating them as part of the room.
If the room is oddly shaped or oversized, a couple of angles from different corners can help, but pick one as the «main» shot for the redesign — mixing angles in a single upload usually confuses the segmentation step rather than helping it.
Declutter first
A tidy room is simply easier for the AI to segment correctly. Clear surfaces and remove obvious clutter so the model isn’t guessing around laundry piles and tangled cables — the result is a cleaner classification of structural versus removable elements, and in turn a cleaner, more believable render.
This doesn’t mean the room needs to be spotless — the AI is generally good at ignoring small everyday items — but a dramatically overcrowded space gives it more to sort through and more room for the mask to go wrong.
Choosing style, room and colors (writing the prompt)
Pick the room type and a style. Tell the tool what kind of room it is — living room, bedroom, kitchen, home office — and choose a style; most tools offer 12 or more, including:
- Modern and Contemporary
- Scandinavian and Japandi
- Midcentury Modern
- Minimalist
- Art Deco
- Boho
- Industrial
- Coastal
- Farmhouse
The room type helps the AI place appropriate furniture, while the style sets the whole visual direction. If you want a fuller breakdown of what each look actually delivers, the interior design styles guide walks through all of them side by side.
Nudge it with words and a palette. On tools that accept a text prompt, short, concrete additions beat vague ones. Useful things to add to a prompt:
- A color palette, e.g. «warm oak and deep emerald, cream walls»
- Materials, e.g. «linen, rattan, matte black»
- A targeted request, e.g. «more plants, keep the window»
- A furniture layout note, e.g. «keep the sofa facing the fireplace»
This is also where you steer a color scheme, a rough furniture layout, or even floor plan ideas without touching the photo itself.
Combine room, style and palette deliberately. A «Scandinavian bedroom» prompt and a «Scandinavian bedroom, sage green and white oak» prompt can produce noticeably different results — the more concrete the direction, the less the model has to guess.
| Style | Typical colors & materials |
|---|---|
| Scandinavian / Japandi | White oak, cream, muted sage, natural light |
| Midcentury Modern | Walnut, mustard, teal, brass accents |
| Minimalist | Monochrome palette, matte finishes, few objects |
| Industrial | Exposed brick, black steel, concrete |
| Coastal | Whites and blues, linen, rattan |
| Farmhouse | Warm wood, white shiplap, wrought iron |
Generating and comparing variations
Most tools return between one and four variations for every run, which means the real work isn’t the first click — it’s what you do with the batch afterward.
Generate a set, then compare
Generate a batch, put the results side by side, and judge them against the real room. A few quick questions to ask of each render:
- Does the furniture layout still make physical sense in the space?
- Is the light and shadow believable for the room’s real windows?
- Would the pieces shown actually fit through the door?
- Does the style feel coherent, or does it mix conflicting eras and materials?
One roundup that tested 13 free AI interior design tools found quality varies a lot between them, so trying two or three tools and comparing outputs is worth the extra few minutes.
Iterate
Change one thing at a time — swap the style, adjust the palette, or simply re-roll the same prompt — while keeping the same input photo, so you’re comparing styles rather than comparing photos. Save the renders you like into a shortlist or a moodboard so you have a reference when you’re ready to shop or talk to a professional.
Most people land on a favorite within three or four rounds. If nothing feels right after that, it’s often the input photo holding things back rather than the style choices — worth revisiting the lighting and framing tips above before trying yet another style.

How realistic is it — and where it stops
The renders are photorealistic ideas, not measured architectural plans, and knowing that distinction up front saves a lot of confusion later.
Great for ideas, not for measurements
The AI has no access to information it was never given, and it can occasionally produce furniture that wouldn’t physically fit or doesn’t exist in the real world. Things it typically doesn’t know about your specific room:
- Exact dimensions and square footage
- Your renovation budget
- Which walls are load-bearing
- Where plumbing and electrical lines run
- Local building codes and permit requirements
Use it to explore direction and build confidence in a look, then verify the details before you act on them. For a fuller look at where an AI render pulls ahead of hiring help and where it falls short, see this comparison of AI room design versus working with a human interior designer.
The soft disclaimer
Treat every AI render as a starting point, not a finished spec. Before you buy furniture, start renovation work, or knock anything down, confirm measurements, materials and any structural or renovation work with a qualified interior designer or licensed contractor. The workflow that works best in practice: explore freely and cheaply with AI first, then bring your favorite two or three renders to a professional for the actual implementation.
None of this takes away from what the tool is good at. It’s simply a different job than the one a contractor or licensed designer does — one is for exploring a hundred ideas in an afternoon, the other is for executing the one you pick correctly and safely.